Saturday, September 26, 2015

Shepards Pie

Its a blessing to be surrounded by family who appreciate and encourage me cooking for them.

This, like most the stuff I make, is a direct result of all the food and gourmet telly shows we end up watching at home.

So here's a result of the experimenting. I present my version of Shepard's pie.


With crispy potato all the way round, tender juicy meat and veg in the middle this rustic dish also has a very good feel good factor to it. Combine it with garlic bread and sautéed veggies and you have a gourmet meal.


Ingredients for the mashed potato crust

Potatoes - 5-6 (med sized)
Cream - 1/4 cup
Milk - 4 tbsp
Butter - 50 gms
Salt - to taste
Pepper - to taste

Method

Boil the potatoes, then peel and mash. Pass through a sieve to get a silky smooth texture. Add milk, butter, cream, salt & pepper and beat together till mixed. Set aside.

Ingredients for the filling

Chicken / Lamb mince - 500 gms
Carrots - 2  (peeled and chopped fine)
Onions - 2 large (chopped fine)
Thyme - a couple of sprigs (2-3 tsp if you have the dried one)
Garlic - 2 tsp chopped
Olive oil - 2 tbsp
Butter - 2 tbsp
Tomato Puree - 300 ml
Worcestershire sauce - 2 tblsp
Sugar - 2 tsp
Salt & pepper - To taste

Method
Sauté the onions, garlic and carrots with the olive oil and butter, until just staring to colour. Add the thyme and Mince. Cook till it changes colour and starts to release liquid. Add the tomato puree and Worcestershire sauce. Cover and cook till the meat is cooked (approx 20 min). Add salt, sugar and pepper. Taste and check. Cook till liquid evaporates. Set aside.

Take the pie dish. Lay the mince mixture in the pie dish. Top with the potato mash. Make a light chequered pattern on the crust with a fork.
Bake in a pre-heated oven till the crust turns golden brown.

The vegetarian version of the same dish may be made from soya granules. Soak the soya granules in warm water for 15 min. Take the granules out and squeeze out the excess water and the rest of the process remains the same.

Serve hot with garlic bread and sautéed vegetables.

Banoffee Pie

As the wife of any service officer will tell you, we are often required to cook up food for an impromptu get-together of friends/acquaintances who happen to be passing through base. This pie goes down as one of my favourite desserts to make as the most important ingredient the 'toffee' can be made months in advance and stored. And when you bring out the dessert, the hungry horde of bachelors/ officers can barely believe you made it at such short notice.

Another feather to the fabled hat never hurt!   

Banoffee Pie
Banoffee Pie or Banana Toffee Pie is a decadent dessert made out of Bananas, Toffee and cream. The humble banana is transformed into this delicacy of exquisite sweetness from the Toffee. The toffee is a short cut recipe to be made from condensed milk. So here goes -


Pie base
Blitz marie biscuits to fine powder consistency. To 150 gms of the powder add 1/4 cup fresh cream and 30 gms melted butter. Mix this with your finger tips. Butter the base of a pie dish / ramekin and pat the mixture on the base and on the sides. The thickness of the base is as you require, we prefer to have about 3-5 mm of thickness. Keep aside.


Pie Filling
To make the toffee - take a tin of condensed milk. Do not open it. Put it in a rice cooker or steamer or a pan of water (remember to remove the plastic items on the tin so that it does not melt in your pot). Cook the tin for about 40 minutes. What you get is a brown thick toffee. (you can eat this by itself as well)

TIP - While you are at it, I suggest you cook 3-4 tins of condensed milk (to save gas / electricity). Now you can store these toffee tins (without opening it) for a good 6-7 months. Open it when required and you have nice toffee.

Take your pie base and spread a layer of toffee over the pie base(thickness depending on how sweet you want your dessert). Now slice bananas and arrange all over the toffee layer. If you like your dessert really sweet, top this with another layer of toffee (it becomes sickeningly sweet but the choice is yours). Top it with whipped cream, decorate with chocolate shavings or decorations or some dry fruits / sliced bananas.
Refrigerate and your dessert is ready. Simple isnt it?


Wednesday, March 5, 2014

100% Whole Wheat Bread


I have always been wanting to make a 100% whole wheat bread. All the recipes I have made till now included some part of 'All purpose flour' or 'maida'. Now, I have always wanted to make a bread with only 'whole wheat flour' or 'atta'. Every time I tried to increase the proportion of whole wheat flour, the bread would either be too dense or would not rise enough. This time, after researching using ebooks from Tanima and going over some recipes online, I decided to go with this particular recipe.

Actually, we used the recipe only for the feel. The conclusion we came to while making this bread was that making bread is actually a 'feel' thing. With experience you get the feel for the dough (which is by far the most important aspect of bread making).

Ingredients (to make 1 loaf in a 10"x4.5" tin)


  • 3 Cups of warm water (the original recipe asked for 1 1/2 cups but the dough was not hydrated enough)
  • 1/6 cup Olive Oil
  • 1/6 cup Honey / Molasses (The recipe asked for molasses, I had it so i used it, if not you can use honey).
  • 1 tsp salt
  • 3 Cups Whole wheat flour (we used Ashirwad atta; why I mention this is because, we have come to the conclusion that every atta / flour has different capacity to absorb water)
  • 1 tbsp active dried yeast

Method

  • Proof 1 tablespoons of Dry Active Yeast in 1 cup of warm water with a tsp of sugar / honey.
  • Then mix the first four ingredients in the bowl (2 cups of warm water, olive oil, honey / molasses, salt)
  • Add: 1 Cups Whole Wheat Flour, add the yeast after it has been activated,
  • Mix well till the consistency is somewhat even. 
  • Then continue to slowly add rest of the flour, 1/2 Cup at a time until the dough quits sticking to the sides of the bowl. It should be tacky to the touch. The trick is to have enough consistency to stand up with the least amount of flour so the bread will be fluffy. Don't over mix or the bread will be tough.
  • When your dough is finished, Cover the bowl and let it rise for about 30-45 minutes in a drought free place. The dough will be larger but it doesn't need to double.
  • Mix again just enough to knock it down at least close to the original size.
  •  Drop the dough on a floured surface so you can work the dough and shape it. Roll it in the flour and shape it in your hands to make a nice ball getting enough flour on it so it isn't sticky. Shape the loaf by turning the dough under it's self over and over. When the dough is shaped right the sides and ends will be sealed and all you will see is a nice oblong shaped loaf with smooth sides and top.
  • Grease the bread tin. Drop the loaves in your bread pan and let them rise until almost doubled. You can top it with some oats,sesame seeds or other whole grains that you like. I had also used flax seeds.
  • Pre-heat the oven to 200deg C. Then bake the bread for 35-40 min at 180 deg C.
  • To get a nice crust, I keep a shallow tin in the oven and either put 3-4 ice cubes  or 1/4 cup boiling water to steam up the oven (twice during the baking cycle, ensuring that the door is open for least time)
  • When done turn the bread out of the pan to a rack to cool. To check if the bread is done, take it out and tap the top of the bread, it should sound hollow.

This is a work in progress guys... we look forward to improving this recipe, will keep updating, until then, happy baking

Friday, February 28, 2014

Eggless Chocolate Cup Cakes

It was Rakhi's farewell get together and a pot luck. I decided to make cup cakes. Now Rakhi being a pure veg... the sort of vegetarian who does not eat cakes if it has eggs. I am not too fond of making cakes without eggs, as they have normally come out dense and not as fluffy and airy as the ones with eggs. But then the pot of luck was for Rakhi and I decided to risk an egg-less cake!! And wonder of wonders, it turned out great. So here goes -
My platter of cup cakes


Ingredients (for the Cake) Makes 16 cup cakes
  • 1 Tsp instant coffee
  • 70 g sugar
  • 200 ml fresh milk
  • 80 g semi-sweet chocolate
  • 80 g butter
  • 1 tsp vanilla essence
  • 100 ml fresh curd
  • 150 g flour (maida)
  • 1 tsp baking powder
  • 1/2 tsp baking soda

Method
Heat up the milk, add the sugar and instant coffee till it dissolves. Take off the flame and before it cools completely add semi sweet chocolate and butter.
 Sift the flour a couple of times, as it gives a good air to the cake.
Once it cools entirely, add beaten curd, vanilla essence and the sifted flour (add the flour in 2-3 stages) along with the baking powder and baking soda. I use my hand held mixer for mixing.

Pre-heat your oven to 180 deg C.
Pour the dough into the cup cake moulds.
Bake at 180 deg C for 12 minutes (till the tops are just springy to touch). Leave in the hot oven (switched off) for another couple of minutes before taking them out and de-moulding them. Enjoy as they are or with icing.

For icing, cool the cakes on a rack before you start.

This is a generic icing which can be used anytime. It is a choco lovers delight. I sourced it from Nigella Lawsons Devils food cake recipe.

Ingredients (for icing)
  • 125 ml water
  • 30 gms brown sugar
  • 175 gms unsalted butter (i used regular amul butter, and it wasnt bad)
  • 300 gms  dark chocolate (finely chopped) 

Method

Put the water,  sugar and butter in a pan over a low heat to melt.
When this mixture begins to bubble, take the pan off the heat and add the chopped chocolate, swirling the pan so that all the chocolate is hit with heat, then leave for a minute to melt before whisking till smooth and glossy. At this point the mixture will seem very runny but rest assured, it will thicken as it cools.
Leave for about 1 hour, whisking now and again.
Use this icing to top off the cup cakes. 
with candied flowers
Top up with sprinkles (if you have some)
Enjoy....

Sunday, April 7, 2013

Sacher Torte

Sacher Torte

A little piece of history

The story of the world-famous Original Sacher-Torte began in 1832, when the Wenzel Clemens Prince Metternich, ordered the creation of a particularly palatable dessert for spoiled high-ranking guests.
"Take care that you do NOT make me look a fool tonight", he warned. That very day, however, the chef was unavailable! The order was reassigned to a 16-year-old apprentice in his second year, the quick-witted chap Franz Sacher...
One thing was certain; the speciality which was finally presented to the masters and mistresses was a resounding success: a soft and fluffy chocolate cake with the tasty apricot jam under the icing.
 
The cake consists of two layers of dense chocolate sponge cake with a thin layer of apricot jam in the middle, coated in dark chocolate icing on the top and sides.
There are innumerable variations of this traditionally secret recipe, this is our favorite version -

Ingredients
  • 150 g dark chocolate, chopped
  • 1 tbsp water
  • 155 g unsalted butter (make sure you use unsalted butter else the taste of the cake changes)
  • 1/2 cup castor sugar
  • 3 eggs (yolk and whites separated)
  • 1 cup plain flour (maida)
  • 2 tbsp castor sugar extra 
  • 2/3 cup apricot jam (heated and strained)
For chocolate icing -
  • 125 g dark chocolate chopped
  • 125 g unsalted butter (once again it is important to use unsalted butter)
Method
Melt chocolate in a heat proof bowl in a hot bath (heat water in a bowl which is smaller than the bowl in which you are melting the chocolate, so that the bowl of chocolate can sit on top of the hot water)
Stir in the water, cool to room temperature.
Cream the butter and sugar in a small bowl (using a small bowl ensures that the butter and sugar combine well with a fluffy consistency) with an electric beater until light and fluffy.
Beat in egg yolks one at a time, beating only until combined. Transfer the mixture to a large bowl, stir in the chocolate mixture and the sifted flour.
Beat egg whites in a separate small bowl until soft peaks are formed (soft peak consistency is when you pull away the whisk the eggs should form a soft peak without collapsing)
Gradually add the extra 2 tbsp of sugar that we had kept aside. Beat until dissolved between each addition. Fold lightly into chocolate mixture. (This is the most important step of the cake; it is very important to fold with a very light hand, ensuring that the egg does not loose its aeration, otherwise the resulting cake will be dense and hard)
Grease a deep 23 cm round cake pan, line the base with butter paper and grease the paper as well. Preheat the oven to 180 deg C. (I use a LG Microwave with convection mode and it works as well as any OTG)
Spread the mixture into the pan. Bake at 180 deg C for 30 min. Check if done with the toothpick method. Stand for 5 min before turning onto a wire rack for cooling. Trim the extra cake on top to give a flat surface and then leave the cake upside down (the bottom portion of the cake is flatter and serves better for icing). 
Split the cake (once cold) in half and place on a serving plate. Brush the heated and strained jam on top of the lower half of the cake, put the other half on top. Brush cake all over with the remaining jam. Stand for about 1 hr to allow the jam to set. (In places with hot summers, you can keep the cake in the refrigerator for half and hour).

For Chocolate Icing - Melt chocolate and butter in a hot bath (as above), stir until smooth. cool to room temperature until spreadable, stir occasionally. The icing will start becoming firmer, this can take upto 2 hours. (Again for places with hot weather, you can keep the icing in the fridge for 10-15 min, stirring frequently). This icing is also suitable for piping.

Now spread the top and sides with the icing. Let the icing set.


Keeping time is 2 days but you can keep it in the refrigerator for 4-6 days.

Lamingtons


LAMINGTONS

 A lamington is a dessert of Australian origin and consists of squares of sponge cake coated first in a layer of chocolate icing (traditionally) and then rolled in desiccated coconut.. Lamingtons are sometimes served as two halves with a layer of cream or jam (strawberry / raspberry) in between. This one comes from one of my aunts recipe books.

Ingredients

For the sponge cake -
  • 6 Eggs
  • 3/4 cups castor sugar (or powdered sugar)
  • 1 cup self raising flour (all purpose flour or maida with 2 tsp of baking soda)
  • 1/3 cup cornflour (I used custard powder in the same proportion)
  • 1/3 cup hot water
  • 15 g melted butter
For Icing
  • 4 cups (500g) icing sugar (or powdered sugar)
  • 1/3 cup Cocoa 
  • 15 g butter (melted)
  • 1/2 cup milk
For the final rolling in
  • 3 cups (250 g approx) dessicated coconut
Method

Beat eggs in a bowl with an electric mixer until thick and creamy; gradually add the sugar, beat until dissolved between each addition.
Put the butter in hot water and combine.
Fold in the sifted flour, then add the combined water and butter.
Pre-heat oven to 190-200 deg Celsius or 375-400 deg F
Grease a 23 cm square pan. Pour in the mixture.
Bake at 190-200 deg C for about 35 min.
Stand for 5 min before turning on to wire rack to cool.
Trim the crusts from the cake and cut into 25 squares (5 slices on each side of the square)

For the chocolate icing - sift the icing sugar and cocoa into a heatproof bowl, stir in the butter and milk, stir over a hot water bath until icing is smooth. (hot water bath - boil water in a large pan and then simmer, now put your bowl of chocolate icing in the large pan so that it does not get direct heat from the flame but the hot water keeps the icing in a syrupy state)

Now dip each piece of the cake into the chocolate icing, then toss in a tray of dessicated coconut till all sides are evenly coated.
Stand on a rack to set.


Keeping time - 2 days (maybe 3-4 if you are stingy and keep it in the fridge)
PS- will add in the pics of the preparation soon


Monday, March 18, 2013

Ber ka Achaar (Kuler Achar)

Ber ka Achaar or Kuler Achar

The other day we were taking a walk and we smelt the fragrance of ripe 'ber', which brought back a host of childhood memories of 'bodo kul & choto kul' and the 'ber-wala' outside the school. Buying a 'chatak' of ber from the ber wala for 5 np (naya paisa) and shooting the seeds from our mouths like cannon. The tree was laden with a thousand ber, so with the kids we had an outing to pluck the ber. I dont know about the kids but i sure had loads of fun throwing a stick up into the tree and waiting for the shower of ber, some ripe and brown and others green; then rushing around to see who picked up the most!!
The recipe was something I tasted as a kid and I referred to the net a bit but went by feel....


Ingredients -
250 gms Ber
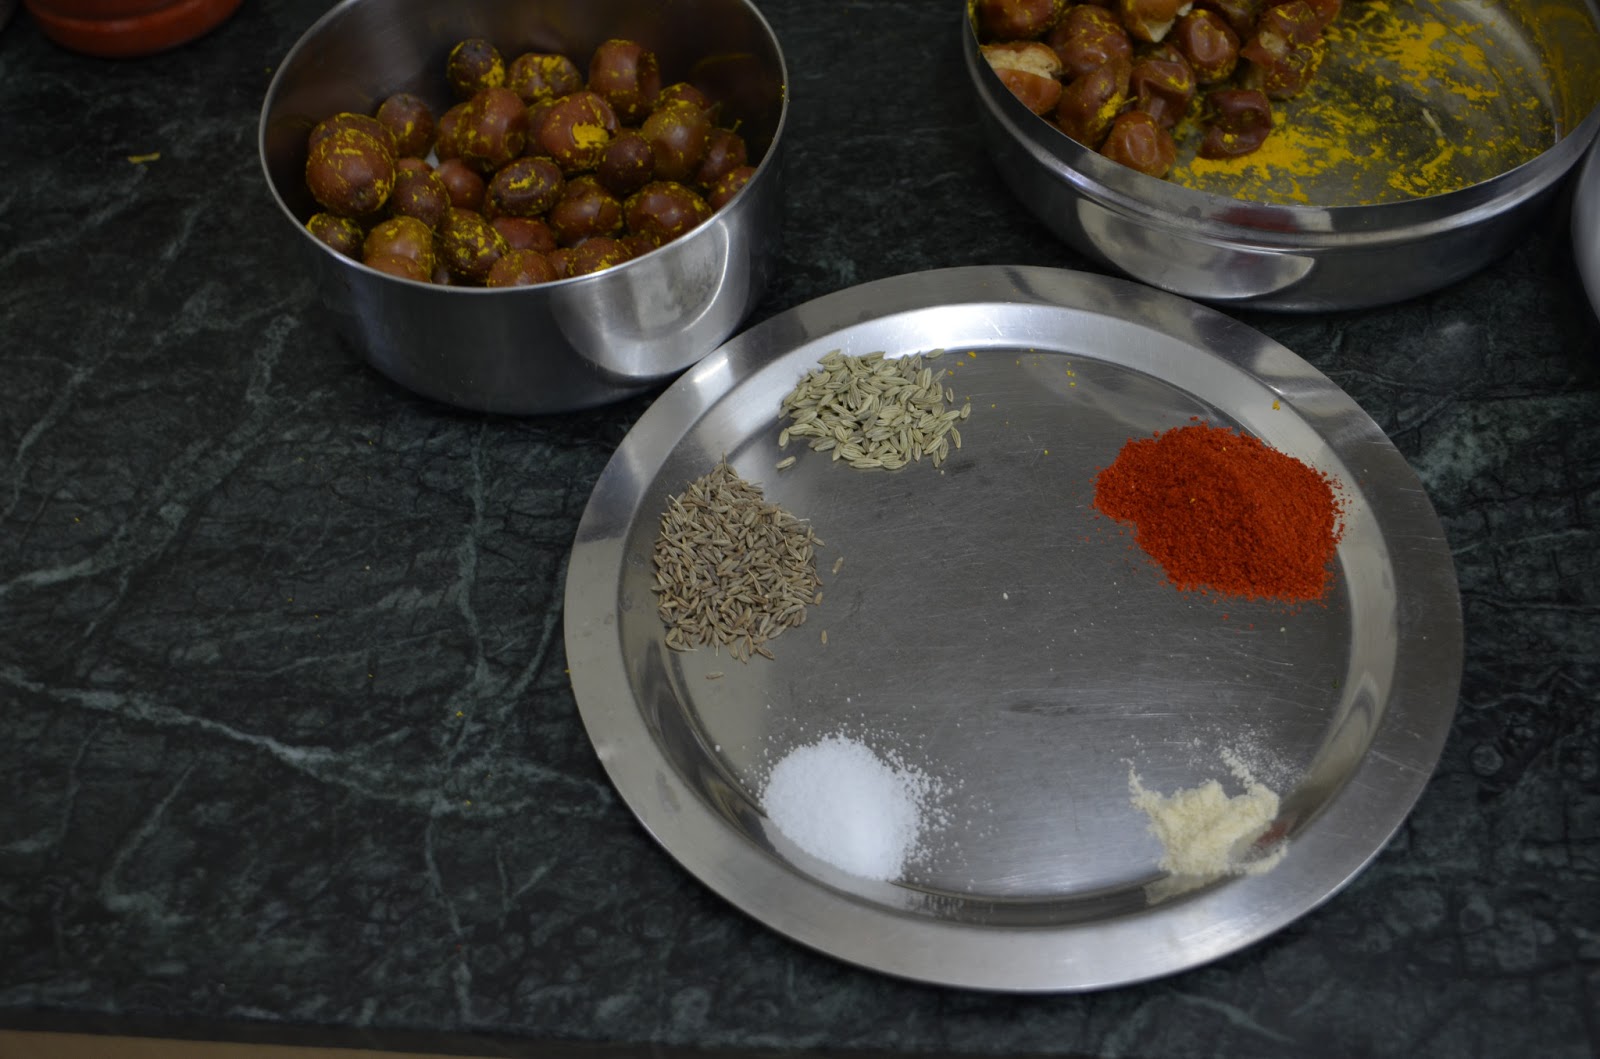
2 tsp Haldi (Turmeric powder) -
1 1/2 cups Jaggery (grated)
2 tsp Mirchi Powder (Chilli powder)
1 tsp Jeera (cumin) Powder
Salt to taste

Jaggery

For Tempering - 

1/2 tsp jeera (cumin seeds)
1/2 tsp saunf (fennel seeds)
1/4 tsp methi (fenugreek seeds)
1 pinch Hing (Asofoetida)
8 tbsp mustard oil


After drying for a day

Method
  • Wash the ber. Carefully slit each one to check for worms (some wild ones do have larvae inside).
  • Add haldi (turmeric) powder and dry in direct sunlight for a day.
  • In a kadai (wok) heat the mustard oil, add the ingredients for tempering; as they splutter add the jaggery and reduce heat and let the jaggery melt. At this point you can add 2-3 tbsp of water to help the jaggery dissolve. This will evaporate as you reduce the mixture.
  • Once the jaggery has melted, add salt, mirchi (chilli) powder and jeera (cumin) powder. Taste and adjust the seasoning as required.
  • Now add the ber and let simmer for 2-3 minutes.
  • Take off the heat and let the mixture cool. The 'kuler achar' is ready to be bottled and consumed.

The final product!!
 What is ber?
This is what the wikipedia has to say - http://en.wikipedia.org/wiki/Ziziphus_mauritiana