Saturday, February 23, 2013

Braided Bread

Despite disagreeing on whether to make whole wheat or all purpose flour bread for most of today morning, we finally agreed to try out a recipe with all purpose flour (only). It turned out great, and the boys loved it.


Ingredients
2 teaspoons active dry yeast
1 cup lukewarm water
4 - 4 1/2 cups all-purpose flour (maida)
1/4 cup white granulated sugar (no need to powder it, regular granulated sugar will do)
2 teaspoons salt
2 large eggs
1 large egg yolk (keep the left over white for the egg wash)
1/4 cup butter / vegetable oil (we used regular salted butter)

Method

Yeast mixture after rising
 In a cup (atleast twice the size of the measuring cup) dissolve a tsp of sugar in 1 cup of luke warm water and let it rest for 10-15 min (till the yeast starts to froth and the water almost doubles). In case it doesn’t rise, then take a fresh pack of yeast and start again for your yeast is dead.


  Mix in your dry ingredients (flour, sugar and salt). Make a well in the mixture and add the eggs (and the yolk) and the butter / oil.

Mix the dry ingredients
Put in the eggs & oil in the middle
Make a well in the middle


the dough is sticky
Make the slurry
 First make a slurry in the middle with the wet ingredients and gradually mix in the flour from the sides. Use a kneader if you have one, else mix it in with a ladle. Once the whole thing becomes one sticky paste/wet dough, take it out on your working surface (which should have been nicely floured so that it doesn’t stick)
Knead it, adding a little flour if required to prevent it from sticking. (believe me, it will be very very sticky, so keep at least half a cup of flour handy). Once the dough is soft, smooth and on pushing in with your thumb, it retains the shape,  it is ready for the first rising.
 Put it in a well oiled vessel and keep covered in a warm area for 1-2 hours (until it has doubled in size)


Dough should at least double in size


Divide into 6 parts
Take out the dough, back on the well floured work surface. Divide it into 6 parts. (Dont worry if the parts are not very equal)

Now roll them into long rope like piece.

Start by using both hands in the middle
Gradually move to the sides so that the thickness remains the same

Till the dough is like a long rope
 Now, keep the ropes together, and pinch together one end.
 Then start braiding by moving the outermost rope over the next two, under the third and over the last two. Now this step is repeated over and over.
 The bread will keep tilting to the left, dont worry, your final product will be nice and straight.


 As you reach the end, pinch the last bits together. Now, using the palm press on the sides to give a rectangular shape to the bread.
Put the dough on a greased baking dish. Now, let the dough rest for another 1/2 hour to 1 hour in a warm corner.[we normally cover it up with a kitchen towel and keep it in the oven (switched off)]
After the second rising

 After the second rising, preheat your oven to 350 deg F or 180 deg C. (Normally, I preheat to 200 deg C and then lower the temp to 180 deg C for the final baking)
Now, use the left over egg white (add 1 tbsp of water) to brush the top surface of the dough generously (it gives the nice colour and sheen to the bread)
 Now, bake for 30 min at 180 deg C.
Tip - To give the feel of a bakers oven, i keep a tray below the rack, and put in a few cubes of ice every 7-8 minutes to increase the humidity inside the oven, this gives the bread a nice crust.
 Once done (you will come to know by the amazing smell of freshly baked bread in the house as well as the hollow sound when you tap the bread), open the oven door a bit and leave for 10 min.
 Then take it out and cool on a wire rack. The bread is ready to be eaten!!! enjoy

 I had some left over dough which i used to make a chicken bun (on the left) and a braided garlic bread. Both came out yummy!!

NEXT ON THE AGENDA, MAKE THIS WITH WHOLE WHEAT FLOUR!!!

Sunday, August 19, 2012

Focaccia Bread

Bread making was something we started as a necessity while in the North-East and loved it so much that we now regularly make our own bread. The smell of freshly baked bread wafting through the house is very comforting and relaxing. Focaccia bread was the first bread we had tried out. Now after a long time, had a free weekend off and we had been planning to try some new type of Focaccia topping. After effects of MasterChef was a Tomato topped one and a caramelised onion topped one. And we believe in using 'atta' in our breads as  much as possible, however, till now we have found that if we use only 'atta' then the bread tends to become heavy and dense, so we are continuously experimenting with different ratios. This bread was being made after a long time, so we decided on an equal proportion of 'atta' and 'maida'. So all you bread lovers - Enjoy

Ingredients
  • 1 1/2 cups Whole Wheat Flour (atta)
  • 1 1/2 cups All purpose Flour (maida) + lots to dust the kneading surface
  • 4 Tbsp Yeast
  • 3 Tsp Salt
  • 3 Tsp Sugar
  • 6 Tbsp Extra Virgin Olive Oil 
  • Oregano, Cummin seeds & Garlic as per your taste, these are entirely optional.

Ingredients for Topping
You can use whatever you like for the topping. The ones we used are
  • 3 Tbsp Extra Virgin Olive Oil for brushing the focaccia
  • Olives
  • Dried Tomatoes (thinly slice one large tomato, and put the slices in the oven at 160 degC for 10-15 min, and you get something like sundried tomatoes)
  • Oregano, Rosemary, Basil, Garlic
  • Cheese (here we dont get much choice of cheese, so it is mostly cheddar or mozarella or at most gouda)
  • Onions (caramelise the onions in butter and oil)
  • Mushrooms (sautéed)
The best part of this recipe is that you can top it with whatever you feel like, so feel free and experiment.

Method
  • Combine the Flours, yeast, salt and sugar. Add 6 tbsp of Olive oil and te 1 1/2 cups of warm water (Tip - add the water in stages). 
  • Mix well to produce a very sticky looking dough. 
  • Now transfer this sticky mess onto a well floured kneading surface. Knead well till you get a nice soft elasticy dough (keep adding more flour, little by little, till you get a soft springy dough)
  • Keep the dough aside (Tip - grease the container well before you put the dough in it as it tends to stick when you take it out) in a drought free place to rise (we normally pre-heat the oven to 40 deg C, put it off and keep the dough inside the oven to rise)
  • Once the dough has risen to almost twice its original size, punch it back in. Split it into 3 equal portions, shape it into whatever shape you want the bread in, we made one flatish focaccia and one regular loaf shaped one (and one portion we stored for making pizzas for the kids, YES you can make pizza bases from the same dough). Keep aside for the final rising for another 30-45 min.
  • Pre-heat the oven to 180 deg C. Place the shaped doughs on your baking surface (we use regular steel plates and it works out find, just remember to grease the plates before placing the dough on it). Make small indentations on the top surface of the dough, brush liberally with olive oil and add your toppings.
  • Bake for 30 min at 180 deg C. You will see the bread rise (it is like magic) and somewhere close to 20 min into baking an amazing aroma of freshly baked bread will start mesmerising you. This is the best indication that your bread is baking well. After 30 min, leave the bread in the hot oven for another 10-15 min, then take it out and keep to cool on a wire rack (we use the wire rack of the oven itself) for another 15 min. Viola, your bread is ready.
I dont think we need to give any tips on how to eat the bread. You can eat it with anything, and just as it is as well. Add some butter or some extra virgin olive oil and eat it - it tastes amazing, especially when the bread is nice and warm.
Cheers


Sunday, May 13, 2012

Orange Cheesecake

Orange Cheesecake
This is a lovely desert. The Orange can be replace with any crush you have - blueberry, strawberry etc. I particularly recommend Blueberry or Orange as they come out good.

Ingredients & Procedure
150gms Marie biscuit powder (buy a packet of Marie biscuit and put it in a blender/mixer to get the powder).
1/4 cup fresh cream
50 gms unsalted butter
Mix all the ingredients together and make the first layer or biscuit base with this. Pat and make the base in the tin.
Note - it is preferable to use a Pie tin or a demould-able tin; this is so that it is easy to take out and serve the cheesecake. If you dont care much about the presentation of the dish, it can be made in any shallow tray.

200gms Whipped cream (now we do get whipped cream in the market, but please do check that it is not just whipped hydrogenated oil) What we do when we dont get whipped cream from the diary is to buy some Amul Fresh cream, add some cream (malai) at home to increase the fat content, add sugar to taste and whip it to make our own whipped cream.
1/2 to 3/4 cup Orange crush (again depending on how much of the flavour you would like in your dessert)
1/2 tin or 100gms of plain cheese spread. (we normally use the Amul Cheese-spread available in the market)
3 tbsp hung curd (or any thick curd)
Few drops of Orange essence (for the other cheesecakes, if you dont have the essence, just put 3/4 cups instead of 1/2 cup mentioned above) You can also add a couple of pinches of Orange colour if you want to give it a more richer colour.
Mix together with a beater so that there are no lumps in the mixture.

3 tbsp melted gelatin (double boiled, soaked and double boiled)
Add this to the above mixture and mix together.

Pour this mixture on top of the biscuit base and refrigerate.

Setting time - 
Deep Freezer - 1 hr
Normal - 4-5 hrs (This is better as the base will not become too hard)


Monday, March 5, 2012

Mitavali & Padhavali Temples

Mitvali & Padhavali group of temples are off gwalior on the gwalior-bhind state highway. To get there you need to head off from gwalior on the state highway towards Bhind/Itawa. Then move off the highway at Malanpur Industrial Area.
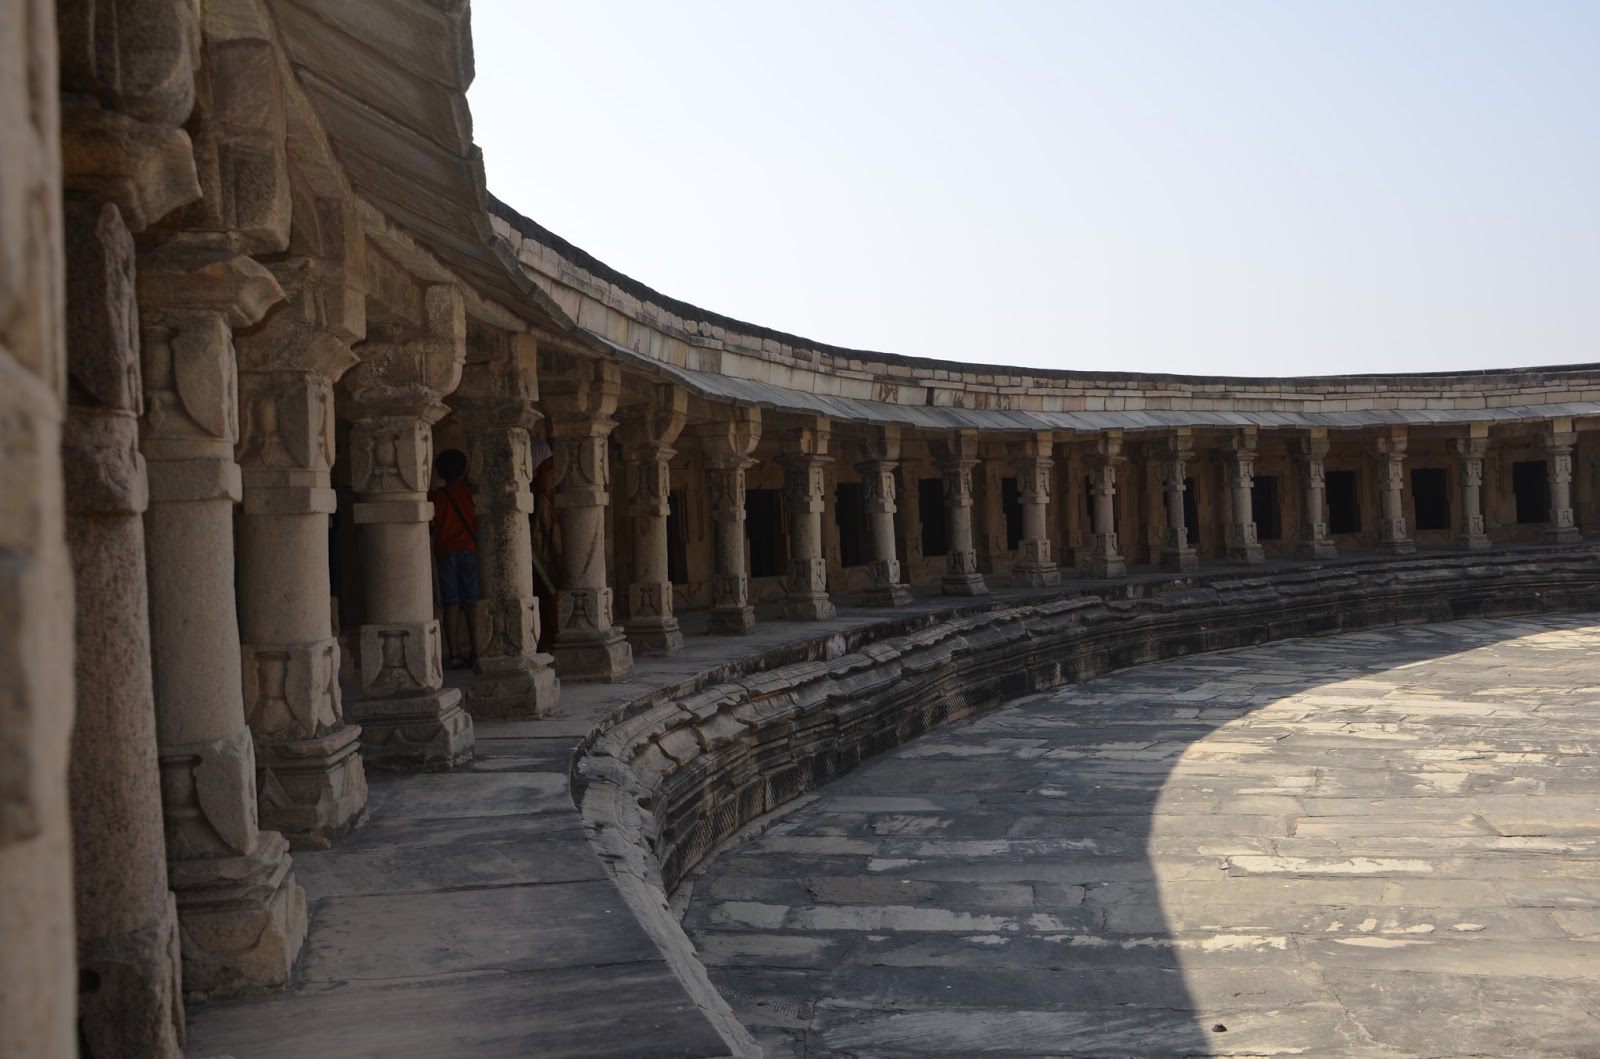
The Chaunsat Yogini temple at Mitavali
 The Mitavali temple is atop a hill which gives a good view of the area all around. The temple is deserted and seems more or less abandoned. It was a chaunsat yogini temple with 64 (i think) small temples in the circular structure which housed (once upon a time) shiv lings. Apparently this was a place of tantric significance.


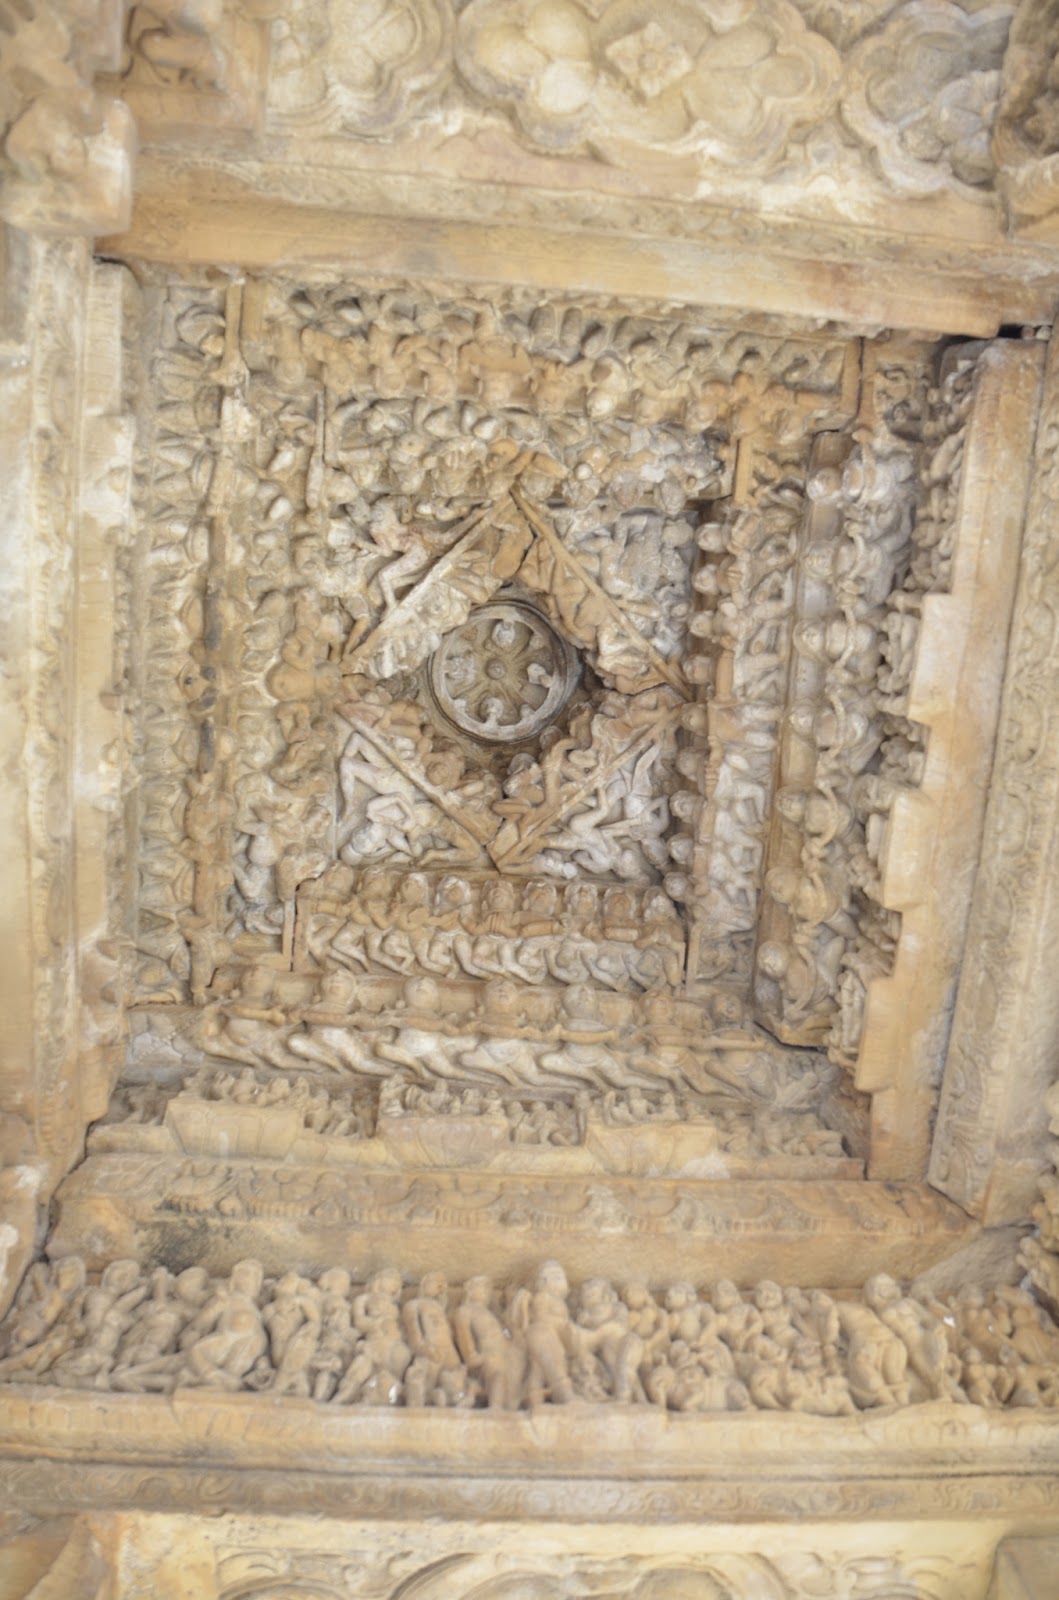
Inside the Chaunsat Yogini Temple at Mitavali
Egyptian Vultures spotted atop the Mitwali Temple


Inside the Bateswhar Temple at Padavali

Padavali 

Padavali

Renovated temple at Padavali
 Around 2-3 Km from Mitvali is Garhi Padavali which used to be a palace with a temple sometime ago. The caretakers here told us that these are from around 800 AD to 1400 AD. The temple inside the palace has some exquisite carvings which has earned the sobriquet of 'Khajuraho of Gwalior'.
Another km from here are the Batesar group of temples which are still being excavated. This is a beautiful picnic spot. The temples are still being excavated and it looks like a great jigsaw puzzle that the people from ASI are setting up.

Renovated Temples

The renovated temples at Padavali

The caretaker at Padavali

We credit the discovery of these temples to our friends Anurag & Ragi.

Pizza sauce 1

Here's the first version of our pizza sauce. It is basically a salsa sauce which we found works wonderfully well on the pizza.
It is a make by feel sauce, and you can put any qty of ingredients as you like.
In a baking tin (depends on how many tomatoes you want to put in), put in some tomatoes, cloves of garlic, small onions, green chillies or peppers (to control the heat, i normally remove the seeds from some and leave the seeds in some). Drizzle some olive oil on top, sprinkle some herbs (once again to taste) like oregano, thyme, rosemary etc.
Put in oven (i prefer grill to convection here) and grill for 10-12 min (depending on how many items you have put in). At the end, the tomatoes should be cooked, and you will know when you can peel off the skin easily. Peel off the skins from the tomatoes and put it all in a blender and blend till its a coarse paste. Add salt to taste and your salsa sauce is ready.

Healthy Pizza base


I have forgotten where we found this recipe, but it is a time tested one. We have made so many pizza's using this recipe.
Ingredients
1 tbsp Sugar / Honey (havent tested it with honey)
1 1/4 cups warm water
1/4 ounce dry yeast
1 1/4 cup all purpose flour (maida)
2 cups flour (atta)
1 tsp salt
1/4 cup olive oil

Method
Dissolve sugar in warm water, add yeast. Keep for 15-20 min till the liquid starts frothing.
Combine yeast liquid, 2 cups flour (atta) and 1 cup all purpose flour (maida) (keep the 1/4 cup for use during kneading)
Knead till dough is no longer sticking to your fingers
Allow to rise - 45 min to an hour. The dough should rise to double. What we do is preheat the oven to 40 deg C and then put it off and keep the dough inside. It hasn't failed to rise till now.
Roll into whatever size pizza's you want. If you want it thicker or thinner it is up to you. After rolling, keep aside for a little while for it to rise a bit. then keep it inside the refrigerator.
Dough rolled out with Cheese filled on the sides

Regular pizza rolled out


For making the pizza -
Pre-heat the oven to 230 deg C. (pizzas are best baked at the hottest setting for shortest time)
grease the plate / pie tin and put the rolled out base on it, use a fork to make holes all over (to let the air escape when baking, else it will fluff up like a chappati). Bake (convection) at 230 deg C for 4-5 min. Once you see it firm up on the outside, you can take it out. This is not a necessary step, however we feel that it helps prevent the pizza from getting soggy when you put the sauce on top.

Take it out, allow to cool a little, put the sauce and toppings and bake once again at 230 deg C for 10-12 min (the time varies depending on the thickness of the pizza)
Toppings of garden fresh cherry tomatoes, olives, onions, bell pepper, cheddar and mozzarella cheese


The pizza is ready!!


Garden fresh veggie bonanza just before it went into the oven

Garden fresh veggie bonanza is now ready!!


Pizza sauce(s) and filling ideas coming up... keep watching this space.